
Pumpkin biscotti wasn’t something I planned to fall in love with—it sort of happened by accident during one of those chilly October mornings when you’re convincing yourself you need only one more cup of coffee. I remember stirring leftover pumpkin purée into a bowl just to “use it up,” and suddenly the whole kitchen smelled like cinnamon and roasted leaves and every fall cliché rolled into one. Honestly? Zero regrets.
What hooked me instantly was the texture. Pumpkin usually makes cookies too soft to crisp up properly, but biscotti? Biscotti wants that crunch. The pumpkin just adds warmth and depth without turning everything cakey. When I sliced the first loaf and sent it back for its second bake, I hovered near the oven like a kid waiting for cookies, half impatient, half nervous.
And then—oh wow. The edges toasted into this gorgeous golden color, and the aroma that came out when I cracked one open… I swear it transported me straight into a cable-knit sweater. My spouse wandered into the kitchen mid-second-bake and asked, “What on earth smells like a coffee shop in here?” which I took as the highest compliment.
The best part is that pumpkin biscotti feels fancy but comes together with such little fuss. You get that crisp, dunkable texture, that gentle pumpkin spice vibe, and a treat that lasts over a week on the counter. It’s the fall baking trifecta: easy, aromatic, and wildly satisfying with coffee.
And maybe this is silly, but there’s something calming about the whole process—shaping the logs, slicing the warm loaf, lining the pieces neatly like fall soldiers getting ready to toast. It slows you down in a good way.
If you’re craving a fall treat that tastes like a cozy afternoon in your favorite café, you’re in the right place.
Recipe Resume (Quick Selling Points)
• Crisp, aromatic biscotti with real pumpkin and warm spices.
• Perfect for dunking in coffee, tea, or hot chocolate.
• Stays fresh for days—great for gifting.
• Easier than cookies: no scooping, no fuss.
• Pumpkin flavor without heaviness.
• Customizable with nuts, chocolate, or dried fruit.
• Great beginner biscotti recipe.
• Feels gourmet but uses simple pantry ingredients.
Why This Pumpkin Biscotti Is the Only One You’ll Ever Need
This recipe officially earned “forever favorite” status after a fall brunch with friends. I brought a big jar filled with biscotti, expecting polite nibbles, but everyone kept snapping pieces and dunking them like it was a competitive sport. One friend even stuffed extras into her bag “for the drive home,” and honestly, I respect the hustle.
Cuisine: Italian-inspired with a cozy American fall twist.
What You Really Need to Make This Amazing Pumpkin Biscotti (Simplified)
- Flour
- Sugar
- Pumpkin purée
- Eggs
- Baking powder
- Cinnamon, nutmeg, ginger
- Salt
- Vanilla
- Optional: pecans, chocolate chips, pumpkin seeds
How to Master the Perfect Pumpkin Biscotti (My Secret Method)
Start by whisking the wet ingredients—the pumpkin, sugar, eggs, and vanilla—until they look smooth and glossy. Fold in the dry ingredients gently; the dough should feel soft but workable, almost like a slightly sticky cookie dough. Wet your hands to shape it into long, even logs.
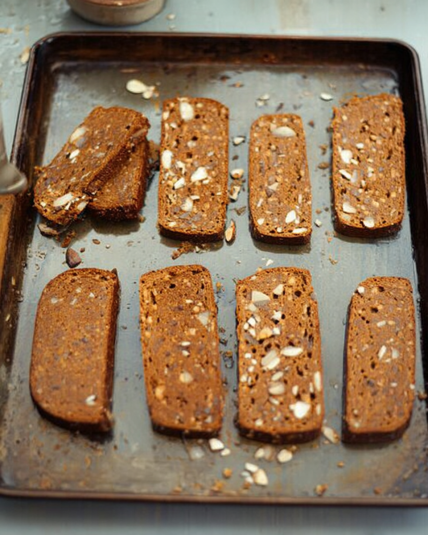
The first bake sets the structure, and you’ll know it’s ready when the top feels firm but still springy. Let it cool just enough to handle, then slice with a gentle sawing motion—thick slices for extra crunch, thinner ones for coffee-shop style crispness. Lay them flat and bake again until they feel dry and toasty.
As they cool, they firm up beautifully into that signature biscotti snap.
Chef’s Notes and Tips For a Flawless Pumpkin Biscotti
Pumpkin adds moisture, so a slightly longer second bake is your friend if you like ultra-crisp biscotti. Flip the slices halfway through for even color. If you prefer a softer crunch, simply shorten the second bake by a few minutes.
Don’t skip cooling between bakes—it helps prevent crumbling and gives you cleaner cuts.
Get Creative! Easy Substitutions and Fun Variations
Add chopped pecans or walnuts for texture, or fold in mini chocolate chips for a mocha-pumpkin vibe. A drizzle of white chocolate makes the edges look bakery-worthy. You can even add dried cranberries for a festive holiday version.
Want a spicier twist? Add a pinch of black pepper—yes, really. It adds beautiful warmth.
Lighten It Up! Simple Swaps for a Healthier Pumpkin Biscotti
Use half whole-wheat pastry flour for extra fiber, swap part of the sugar for a natural sweetener, or reduce the chocolate add-ins. For a lower-fat version, replace part of the eggs with extra pumpkin purée (just keep the dough firm enough to shape).
And there you have it! Don’t forget to let us know how your biscotti turns out, and consider checking out some of our other Recipes.
Are You Curious About Anything Else? Take a Look at the Most Frequently Asked Questions We Get About This Recipe
1. How do I keep pumpkin biscotti crispy without drying them out?
Achieving that ideal crunchy-but-not-rock-hard texture is all about managing moisture. Pumpkin brings natural softness, so the second bake is crucial. Baking the slices low and slow helps remove moisture gradually so the biscotti stay crisp without turning chalky. Let them cool fully—they harden significantly as they cool, which often surprises first-timers.
Store them loosely covered for the first 24 hours. If they’re packed airtight immediately, that trapped steam softens the texture.
2. Why is my pumpkin biscotti dough sticky?
Pumpkin adds extra hydration, so a slightly sticky dough is completely normal with an easy pumpkin biscotti recipe. Wet your hands before shaping, and dust lightly with flour if needed. Avoid adding too much extra flour or your biscotti may lose their crunch and become dense after baking. The stickiness disappears once baked.
3. Can I make biscotti without nuts?
Absolutely. Nuts are completely optional. The biscotti hold their structure beautifully with or without add-ins. If you omit nuts, consider adding pumpkin seeds or chocolate chips for texture variation during the second bake.
4. How long does pumpkin biscotti stay fresh?
Stored in a cookie jar or loosely covered container, your biscotti stay crisp for up to a week. In an airtight container, they’ll soften slightly but can be re-crisped in a low oven for 8–10 minutes.
5. Can I freeze pumpkin biscotti?
Yes—pumpkin biscotti freeze wonderfully. Wait until they’re fully cooled, then store in a freezer-safe bag. When you’re ready to enjoy, thaw at room temperature or pop them into a low oven for a few minutes to revive their crunch.
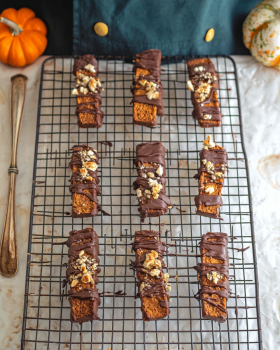
6. Can I dip these biscotti in chocolate?
Definitely. Melt chocolate, dip the ends, and let them set on parchment. For flavor, dark chocolate pairs beautifully with warm pumpkin spice. This also helps preserve crispness.
7. Why did my biscotti crumble when slicing?
If the first bake was too short, the interior remains too soft and may crumble when you slice. Let the loaf cool just enough to handle before slicing with a serrated knife. Thin, gentle sawing motions create clean pieces.
8. What’s the best way to serve pumpkin biscotti with coffee?
Their slightly spiced, crisp edges make them perfect for dunking. Pair them with espresso, cappuccino, chai, or even hot apple cider. For a café-style treat, drizzle a little glaze on top and serve them in a tall jar on the table.
Pumpkin Biscotti
4
servings30
minutes40
minutes300
kcalIngredients
Flour
Sugar
Pumpkin purée
Eggs
Baking powder
Cinnamon, nutmeg, ginger
Salt
Vanilla
Optional: pecans, chocolate chips, pumpkin seeds
Directions
- Start by whisking the wet ingredients—the pumpkin, sugar, eggs, and vanilla—until they look smooth and glossy. Fold in the dry ingredients gently; the dough should feel soft but workable, almost like a slightly sticky cookie dough. Wet your hands to shape it into long, even logs.
- The first bake sets the structure, and you’ll know it’s ready when the top feels firm but still springy. Let it cool just enough to handle, then slice with a gentle sawing motion—thick slices for extra crunch, thinner ones for coffee-shop style crispness. Lay them flat and bake again until they feel dry and toasty.
- As they cool, they firm up beautifully into that signature biscotti snap.