
Lemon bars have always felt like sunshine pretending to be dessert. Even on gray days. Especially on gray days. I think that’s why I keep coming back to them—when the world feels a little heavy, lemon shows up and nudges everything lighter.
I first made lemon bars on a whim, chasing a craving for something fresh but comforting. Butter and sugar were already on the counter. Lemons sat patiently in the fruit bowl. It felt like fate, honestly.
The smell of the shortbread baking alone was enough to slow me down. Toasty, buttery, calm. Then came the lemon filling—bright, sharp, and a little cheeky, like it knew it was about to steal the show.
What I love most about easy homemade lemon bars is the contrast. Crisp base. Silky top. Sweet meets tart in that perfect middle ground where no one argues over dessert.
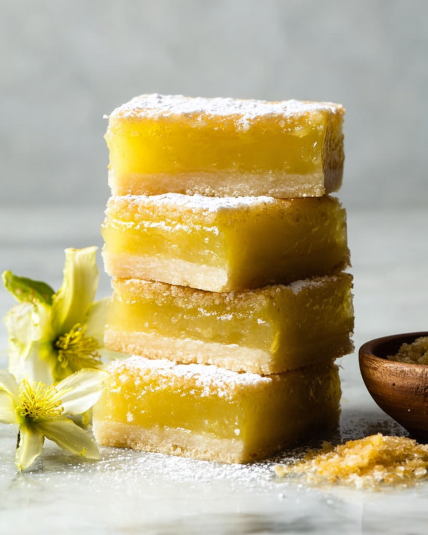
They’re unfussy but impressive. Casual yet elegant. The kind of treat that disappears faster than you expect, no matter who’s at the table.
I’ve tweaked this recipe gently over time—less sweetness here, more lemon there—until it became my this is it version. The one I reach for again and again.
If you’re looking for lemon bars that are not too sweet, with real citrus flavor and a melt-in-your-mouth crust, you’re in the right kitchen.
Recipe Résumé (Why These Lemon Bars Win)
- Bright, real lemon flavor
- Buttery shortbread crust
- Perfect sweet-tart balance
- Simple pantry ingredients
- Sliceable, shareable, reliable
- Great for parties or gifting
- Beginner-friendly
- Always a crowd favorite
Why This Lemon Bars Recipe Is The Only One You’ll Ever Need
This recipe became “the one” after a family gathering where someone quietly packed a few pieces to take home. That’s how you know.
They’re classic without being boring. Sharp but not sour. Sweet, but never cloying. The crust holds firm, the filling sets beautifully, and the whole thing just works.
Cuisine: Classic American baking with a bright citrus twist.
What You Really Need to Make This Amazing Lemon Bars Recipe (Simplified)
- Unsalted butter
- Granulated sugar
- All-purpose flour
- Salt
- Fresh lemons (juice + zest)
- Eggs
- Powdered sugar (for dusting)
How to Master the Perfect Lemon Bars (My Secret Method)
Start with the crust. Cream the butter and sugar until soft and pale—nothing fancy, just smooth and friendly. Press it into your pan and bake until lightly golden. You want it set, not dark.
While that’s happening, whisk the eggs, sugar, lemon juice, zest, and flour until silky. It should smell bright. If it doesn’t, add more zest. Lemon flavor lives there.
Pour the filling over the warm crust—yes, warm. This helps the layers bond without slipping. Bake again until the center barely jiggles. Barely.
Cool completely before slicing. I know it’s hard. But lemon bars need patience to become themselves.
Chef’s Notes and Tips For A Flawless Lemon Bars Recipe
Fresh lemon juice is non-negotiable. Bottled juice dulls the flavor and leaves bitterness behind.
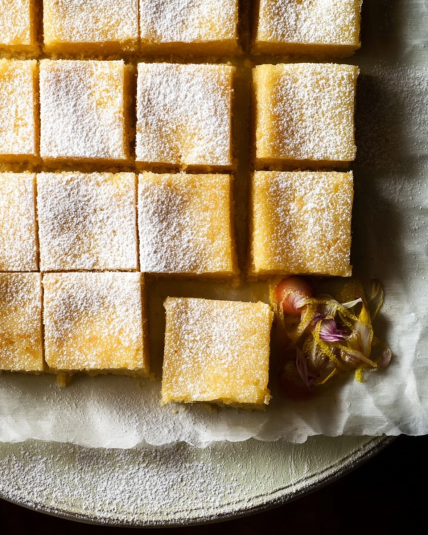
If you want clean slices, chill the bars before cutting and wipe your knife between cuts. Small thing. Big difference.
Get Creative! Easy Substitutions and Fun Variations
Add a hint of vanilla to the filling for warmth. Or swap a tablespoon of lemon juice for lime for a subtle twist.
A pinch of salt on top after baking? Unexpected. Lovely.
Lighten It Up! Simple Swaps for a Healthier Lemon Bars Recipe
Reduce sugar slightly and boost zest for flavor without extra sweetness. Use whole-wheat pastry flour for the crust if you like.
For gluten-free, a 1:1 gluten-free flour blend works surprisingly well here.
Closing
And there you have it—how to make lemon bars from scratch, bright, buttery, and completely worth the wait. If you bake them, tell me everything. And don’t forget to explore some of our other recipes while you’re here.
Are You Curious About Anything Else? Take a Look at the Most Frequently Asked Questions We Get About Lemon Bars
1. Why did my lemon bars turn out too sweet?
Most lemon bars rely heavily on sugar without balancing acidity. For lemon bars that are not too sweet, the key is increasing zest and using freshly squeezed juice.
Zest brings aroma and sharpness without sourness, creating balance instead of more sugar.
2. How do I know when lemon bars are done baking?
The edges should be set, and the center should have a gentle wobble—no liquid movement. Overbaking leads to rubbery texture.
They continue setting as they cool, so trust the jiggle.
3. Can I make lemon bars ahead of time?
Yes—best lemon dessert bars for parties are make-ahead friendly. Bake them a day in advance and refrigerate.
They actually slice better once chilled.
4. Should lemon bars be refrigerated?
They don’t have to be immediately, but refrigeration helps them hold shape and stay fresh longer.
Store covered for up to five days.
5. Can I freeze lemon bars?
Absolutely. Freeze sliced bars between parchment layers for up to two months.
Thaw in the fridge overnight for best texture.
6. Why is my crust soggy?
The crust likely wasn’t baked long enough. It should be lightly golden before adding filling.
Warm crust + properly baked base = crisp bottom.
7. What lemons work best?
Regular Eureka or Lisbon lemons are perfect. Meyer lemons are sweeter, so reduce sugar slightly if using them.
Always zest before juicing.
8. How do I get clean slices?
Chill completely, use a sharp knife, and wipe between cuts.
That’s the quiet secret to bakery-style lemon bars.
Lemon Bars
4
servings30
minutes40
minutes300
kcalIngredients
Unsalted butter
Granulated sugar
All-purpose flour
Salt
Fresh lemons (juice + zest)
Eggs
Powdered sugar (for dusting)
Directions
- Start with the crust. Cream the butter and sugar until soft and pale—nothing fancy, just smooth and friendly. Press it into your pan and bake until lightly golden. You want it set, not dark.
- While that’s happening, whisk the eggs, sugar, lemon juice, zest, and flour until silky. It should smell bright. If it doesn’t, add more zest. Lemon flavor lives there.
- Pour the filling over the warm crust—yes, warm. This helps the layers bond without slipping. Bake again until the center barely jiggles. Barely.
- Cool completely before slicing. I know it’s hard. But lemon bars need patience to become themselves.