
The first time I made knafeh, I didn’t expect it to feel… this satisfying.
I mean, I knew it would taste good—crispy pastry, melted cheese, sweet syrup. That’s already a promise.
But what surprised me was the process.
There’s something oddly calming about working with those fine strands of dough, gently separating them, coating them in butter. It feels delicate, almost like handling something precious.
And then the smell hits. Butter warming, pastry crisping, and that subtle sweetness building in the background.
I remember peeking into the oven way too often—just to watch the color deepen into that perfect golden shade.
But the real moment? The flip.
That slightly nerve-wracking, “please don’t fall apart” flip onto the plate… followed by instant relief when it comes out perfectly intact.
Then the syrup. That slow pour. That quiet sizzle.
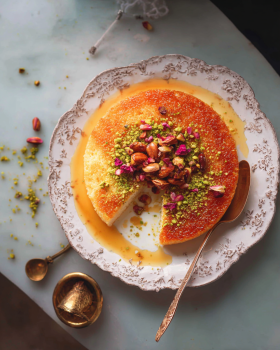
And finally, the slice. That beautiful cheese pull that makes you pause for a second before taking a bite.
This authentic knafeh recipe with cheese and syrup isn’t just dessert—it’s an experience from start to finish.
Recipe Resume (Why You NEED This)
Crispy outside, gooey inside.
That iconic cheese pull.
Perfect balance of sweet and savory.
Impressive yet doable.
Great for special occasions.
Rich, comforting flavor.
Make-ahead friendly.
Absolutely unforgettable.
Why This Knafeh Is The Only One You’ll Ever Need
The first time I served this, I was nervous. Knafeh has a reputation—it’s not exactly a “quick dessert.”
But once it hit the table? Silence.
Then came the reactions. “Wait… did you make this?” That kind of reaction.
That’s when I realized this crispy knafeh recipe with stretchy cheese is worth every step.
It’s not about perfection. It’s about that moment when someone takes a bite and just stops for a second.
Now, it’s my go-to when I want something that feels special. Something that makes people pause.
Cuisine: Middle Eastern / Levantine
What You Really Need to Make This Amazing Knafeh (Simplified)
- 500g kataifi (shredded phyllo dough)
- 200g melted butter
- 300g mozzarella cheese (or akkawi, desalinated)
- 1/4 cup sugar
For the syrup:
- 1 1/2 cups sugar
- 1 cup water
- 1 teaspoon lemon juice
- 1 teaspoon orange blossom water
For topping:
- Crushed pistachios
How to Master the Perfect Knafeh (My Secret Method)
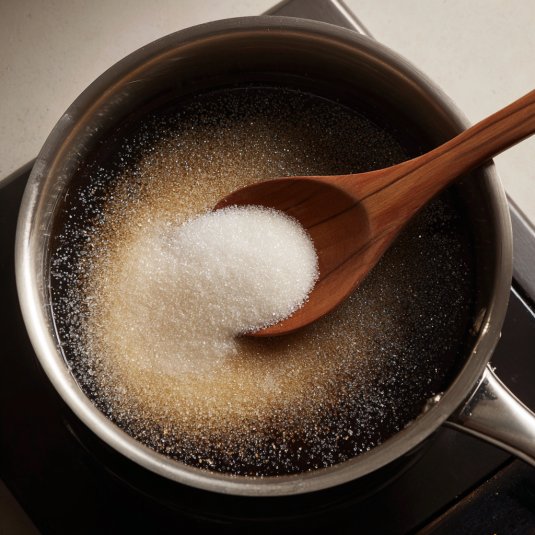
Start with the syrup—always. Simmer sugar and water gently, add lemon juice, then finish with orange blossom water. Let it cool completely.
Now take your kataifi and gently separate the strands. It might feel messy at first, but that’s okay. Drizzle melted butter and work it through with your hands until everything is coated.
Divide it roughly in half.
Press one half firmly into a greased pan. This is your base—compact it enough to hold together, but don’t crush it completely.
Sprinkle the cheese evenly over the top. Not too thick, not too thin—just a balanced layer.
Cover with the remaining kataifi, pressing lightly to seal everything in.
Bake until deeply golden and crisp. You’ll smell it before you see it—it’s that good.
Now comes the moment. Carefully flip it onto a serving plate.
Immediately pour the cooled syrup over the hot knafeh. Listen for that gentle sizzle.
Finish with pistachios… and try to wait at least a few minutes before cutting.
Chef’s Notes and Tips For A Flawless Knafeh
The cheese matters more than you think. If using mozzarella, go for low-moisture to avoid excess liquid. If using traditional cheese, soak it in water beforehand to remove saltiness.
Also, don’t rush the browning. That deep golden color is what gives knafeh its signature crunch. Pale knafeh just doesn’t hit the same.
Get Creative! Easy Substitutions and Fun Variations
Use cream filling instead of cheese for a softer version.
Add rose water instead of orange blossom for a floral twist.
Mix nuts into the filling for added texture.
Make individual portions in small pans for serving.
Lighten It Up! Simple Swaps for a Healthier Knafeh
Use less butter while still coating evenly.
Reduce syrup quantity slightly.
Choose lower-fat cheese options.
Serve smaller portions—this dessert is rich, so a little goes a long way.
Closing
And there you have it! Crispy, golden, cheesy perfection.
This easy knafeh dessert with kataifi and mozzarella is one of those recipes that feels like an achievement—and tastes even better.
Take your time, enjoy the process, and don’t forget to explore more comforting recipes right here.
Are You Curious About Anything Else? Take a Look at the Most Frequently Asked Questions We Get About This Recipe:
1. What is knafeh made of?
This authentic knafeh recipe with cheese and syrup is made from shredded phyllo dough (kataifi), butter, cheese, and a sweet sugar syrup infused with orange blossom water.
The combination creates that signature contrast—crispy exterior, soft melted interior, and sweet finish.
It’s simple ingredients, but the technique brings it all together.
2. What cheese is best for knafeh?
Traditionally, akkawi or nabulsi cheese is used. These cheeses have a slightly salty flavor that balances the sweetness.
For an easy knafeh dessert with kataifi and mozzarella, mozzarella is a great substitute because it melts well and gives that iconic stretch.
Just make sure to use low-moisture mozzarella for best results.
3. How do I keep knafeh crispy?
To achieve a crispy knafeh recipe with stretchy cheese, bake until deeply golden and avoid covering it while hot.
Also, use cooled syrup on hot knafeh—this helps maintain texture without making it soggy.
Serve soon after preparing for the best crispness.
4. Can I make knafeh ahead of time?
You can prepare it ahead but bake it fresh for best results. Assemble everything and refrigerate, then bake when ready.
This how to make knafeh at home step by step method keeps the texture at its best.
Reheating fully baked knafeh can soften the crisp layers.
5. Why is my knafeh soggy?
Too much syrup or excess moisture from cheese can cause sogginess.
For a traditional Middle Eastern knafeh with orange blossom syrup, always control syrup quantity and use the right cheese.
Also, avoid pouring syrup too quickly—let it absorb gradually.
6. Can I freeze knafeh?
Yes, but it’s best to freeze it before baking. Assemble and freeze, then bake fresh.
This preserves the texture better than freezing after baking.
Avoid freezing syrup-soaked knafeh—it won’t hold up as well.
7. What’s the difference between knafeh and baklava?
While both are Middle Eastern desserts, knafeh is cheese-based with shredded pastry, while baklava uses layered phyllo and nuts.
Knafeh has a gooey, stretchy center, while baklava is crisp and nutty throughout.
They’re both delicious—but very different experiences.
8. How do I get the perfect cheese pull?
Use good-quality melting cheese and don’t overbake.
For the best results in this crispy knafeh recipe with stretchy cheese, serve it warm—not hot, not cold.
That perfect moment is when the cheese stretches effortlessly with each bite.
Knafeh
4
servings30
minutes40
minutes300
kcalIngredients
500 g kataifi (shredded phyllo dough)
200 g melted butter
300 g mozzarella cheese (or akkawi, desalinated)
1/4 cup sugar
For the syrup:
1 1/2 cups sugar
1 cup water
1 teaspoon lemon juice
1 teaspoon orange blossom water
For topping:
Crushed pistachios
Directions
- Start with the syrup—always. Simmer sugar and water gently, add lemon juice, then finish with orange blossom water. Let it cool completely.
- Now take your kataifi and gently separate the strands. It might feel messy at first, but that’s okay. Drizzle melted butter and work it through with your hands until everything is coated.
- Divide it roughly in half.
- Press one half firmly into a greased pan. This is your base—compact it enough to hold together, but don’t crush it completely.
- Sprinkle the cheese evenly over the top. Not too thick, not too thin—just a balanced layer.
- Cover with the remaining kataifi, pressing lightly to seal everything in.
- Bake until deeply golden and crisp. You’ll smell it before you see it—it’s that good.
- Now comes the moment. Carefully flip it onto a serving plate.
- Immediately pour the cooled syrup over the hot knafeh. Listen for that gentle sizzle.
- Finish with pistachios… and try to wait at least a few minutes before cutting.