
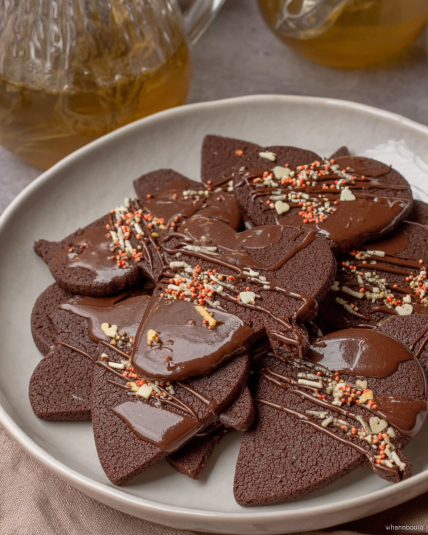
There’s something about chocolate biscuits that instantly pulls me back into the warm, cozy afternoons of my childhood. I swear I can still smell that buttery-cocoa aroma drifting from the kitchen long before the oven timer even beeped. It’s funny how a flavour so simple can feel so grounding, right?
I started making these biscuits again a few winters ago when I desperately needed a little mood-lifting treat—nothing fancy, nothing fussy, just a simple chocolate biscuit dough I could throw together with pantry basics. And somehow… this became one of those recipes everyone keeps asking for.
The first batch came out slightly uneven, a little rustic with one or two crooked edges—but honestly? That made me love them more. There’s something charming about cookies that look like they were made by a real human being rather than a factory machine.
What I love most about this recipe is how quickly it comes together. You don’t need eggs, you don’t need special equipment, and you don’t need hours of chilling time. Just a bowl, a spoon, and maybe someone to swipe the last biscuit off the tray when you’re not looking.
Every time I bake these, the kitchen fills with that rich chocolate smell that makes you immediately reach for a cup of coffee or tea. And yes… I absolutely dunk them. No shame.
Whether you’re baking for kids, for guests, or for yourself on a “treat-me” kind of day, these easy homemade chocolate biscuits hit the spot every single time.
Recipe Resume (Quick Selling Points)
- Crisp edges with soft, chocolatey centers—yes, the dream combo.
- Pantry ingredients only. Zero fuss.
- Dough comes together in five minutes. Truly.
- No eggs, perfect for anyone with allergies.
- A forgiving recipe—hard to mess up, promise.
- Pairs beautifully with tea, coffee, or hot chocolate.
- Easily doubled for gifting or sharing.
- Smells like a bakery, tastes like comfort.
Why This Chocolate Biscuits Recipe Is the Only One You’ll Ever Need
I still remember handing a fresh warm batch to my sister one Sunday afternoon. She took a bite, paused mid-sentence, and said, “Wait—why are these so good?” We ended up eating half the tray while standing next to the counter like two kids hiding from responsibility.
This is classic American-style home baking, but with the flexible, everyday approach I love—simple ingredients, simple steps, big flavour payoff. It quickly became a family favourite, the kind of biscuit recipe that lives taped to the inside of the cupboard door.
What You Really Need to Make This Amazing Chocolate Biscuits (Simplified)
- 1 cup all-purpose flour
- ¼ cup unsweetened cocoa powder
- ½ cup sugar
- ½ cup softened butter
- 1 tsp vanilla
- 1 tsp baking powder
- 2–3 tbsp milk (just enough to bring dough together)
- Pinch of salt
How to Master the Perfect Chocolate Biscuits (My Secret Method)
Start by mixing your dry ingredients together—think of it like creating a soft cocoa “snow.” Then drop in the butter and work it in with the back of a spoon or your fingertips until it looks sandy and crumbly. It should remind you of damp beach sand… just darker and a lot more delicious.
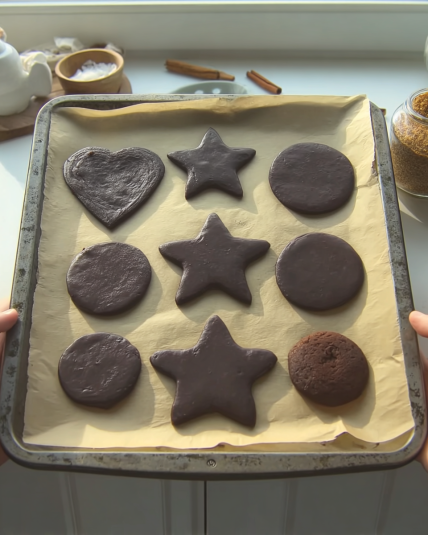
Add the vanilla and a splash or two of milk until the dough starts to cling together. Don’t overdo it—this dough likes to be handled gently. Shape it into small disks or roll little balls and press them lightly with a fork.
Slide them into a warm oven and watch for that moment when the tops look slightly matte instead of shiny. That’s the sweet spot where they stay crisp but not dry.
Chef’s Notes and Tips For a Flawless Chocolate Biscuit
Let the biscuits cool fully before moving them. They’re fragile when hot but crisp up beautifully as they rest. Also, try not to flatten them too much; the thickness is what gives that perfect bite-texture contrast.
If you love extra depth, add a sprinkle of instant coffee powder to the dry ingredients. It won’t taste like coffee—it just boosts the chocolate flavour like magic.
Get Creative! Easy Substitutions and Fun Variations
Swap the butter for coconut oil for a slightly tropical aroma. Stir in mini chocolate chips if you want bursts of melty goodness. Or roll the dough in sugar before baking for a sparkly, crackly finish that feels very bakery-style.
You can also turn them into sandwich biscuits with a quick cocoa buttercream—absolute showstopper for parties.
Lighten It Up! Simple Swaps for a Healthier Chocolate Biscuit
Use whole-wheat flour for extra fibre, reduce the sugar to ⅓ cup, or use a sugar alternative that measures cup-for-cup. Coconut oil works beautifully for a dairy-free, lower-cholesterol version. And if you’re watching calories, make smaller biscuits—they bake faster and satisfy cravings just as well.
And there you have it!
A tray full of comforting, chocolatey goodness. Don’t forget to let us know how your biscuits turn out, and check out our other recipes if you’re craving more cosy treats.
Are You Curious About Anything Else? Take a Look at the Most Frequently Asked Questions We Get About This Recipe
1. Why do my chocolate biscuits spread too much?
Sometimes biscuits spread when the butter is too soft or when the dough contains slightly too much milk. For the best easy homemade chocolate biscuits recipe, I always recommend chilling the dough for 10 minutes if your kitchen is warm. Another reason is overmixing—once the dough gets sticky, gluten develops, which encourages spreading. Keep your mixing gentle and brief.
2. Can I make chocolate biscuits without eggs?
Absolutely—this recipe is already a crispy chocolate cookies without eggs formula. The milk provides enough moisture for binding, and the butter gives structure. Egg-free biscuits often bake faster, so keep an eye on them near the end to maintain that ideal crisp-outside, soft-inside texture.
3. Can I freeze the dough?
Yes! Roll it into balls, freeze on a tray, then store in bags. Frozen biscuit dough bakes beautifully and is perfect for quick snacks or last-minute guests. Add one extra minute to the bake time—no thawing needed.
4. How do I make the biscuits extra crispy?
Bake them a tiny bit longer—just until the edges darken slightly. A lower moisture dough also helps, so avoid adding extra milk beyond what’s necessary. Crispy lovers swear by letting the biscuits cool on the tray.
5. Why do my biscuits taste bland?
Quality cocoa matters. Use a good unsweetened cocoa powder, and don’t skip the pinch of salt—it sharpens the chocolate flavour dramatically. A touch of vanilla rounds it out.
6. Can I double this quick chocolate biscuit recipe?
Yes, and the dough holds beautifully even in large batches. If doubling, consider using two baking sheets to prevent crowding. Crowded biscuits steam instead of crisp.
7. Are these good for gifting?
They’re perfect! The crisp texture holds up well in tins, and the flavour stays rich for days. Add a ribbon and a handwritten note for charm.
8. How do I store the biscuits so they stay fresh?
Keep them in an airtight container. Add a small piece of parchment to absorb moisture if your climate is humid. These best chocolate biscuits for tea stay fresh up to a week.
Chocolate Biscuits
4
servings30
minutes40
minutes300
kcalIngredients
1 cup all-purpose flour
¼ cup unsweetened cocoa powder
½ cup sugar
½ cup softened butter
1 tsp vanilla
1 tsp baking powder
2 –3 tbsp milk (just enough to bring dough together)
Pinch salt
Directions
- Start by mixing your dry ingredients together—think of it like creating a soft cocoa “snow.” Then drop in the butter and work it in with the back of a spoon or your fingertips until it looks sandy and crumbly. It should remind you of damp beach sand… just darker and a lot more delicious.
- Add the vanilla and a splash or two of milk until the dough starts to cling together. Don’t overdo it—this dough likes to be handled gently. Shape it into small disks or roll little balls and press them lightly with a fork.
- Slide them into a warm oven and watch for that moment when the tops look slightly matte instead of shiny. That’s the sweet spot where they stay crisp but not dry.