
The first time I poached pears, I thought it was going to be complicated.
Fancy dessert territory, you know?
But then the kitchen filled with warm ginger, cinnamon, and that sweet pear aroma — and suddenly it felt cozy instead of intimidating.
I remember sneaking a spoonful of the syrup straight from the pot. (No regrets.)
That syrup alone could be bottled and sold.
When I folded those tender pears into a soft ginger cake for the first time, something magical happened.
The cake stayed unbelievably moist.
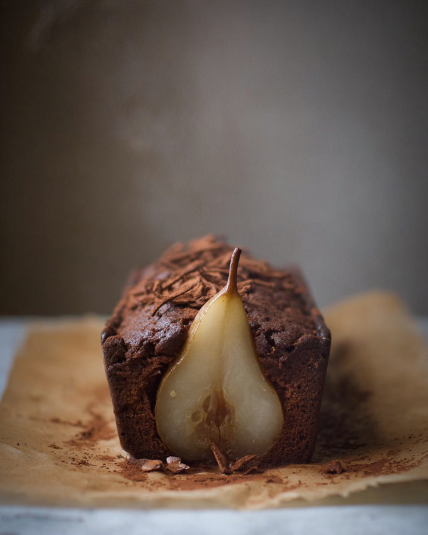
Every bite had a gentle spice warmth followed by bursts of juicy fruit.
It felt like autumn wrapped in a blanket.
Now it’s my go-to dessert for gatherings — the one people ask about before the plates are even cleared.
Simple ingredients. Big comfort.
And just fancy enough to feel special.
Recipe Resume — Why You’ll Love This
Incredibly moist crumb
Warm ginger spice
Juicy poached pears
Comforting yet elegant
Perfect for holidays
Smells amazing baking
Great make-ahead cake
Always a crowd favorite
Why This Poached Pear Ginger Cake Is The Only One You’ll Ever Need
I made this for a chilly Sunday dinner once when friends dropped by unexpectedly.
I thought it would be “just a cake.”
They scraped the pan clean.
One friend asked if it was from a bakery. Another asked for the recipe before dessert plates were empty.
That deep ginger flavor paired with soft fruit just works — every single time.
Cuisine: Cozy European-Inspired Dessert
What You Really Need to Make This Amazing Poached Pear Ginger Cake (Simplified)
- Ripe but firm pears
- Brown sugar
- Fresh ginger (or ground)
- Cinnamon & cloves
- Butter or oil
- Eggs
- Flour
- Baking soda
- Vanilla extract
- Milk or yogurt
How to Master the Perfect Poached Pear Ginger Cake (My Secret Method)
Start by simmering peeled pears in water with brown sugar, ginger, and warm spices until just tender. Let them soak up all that cozy syrup while you prep the batter.
Cream butter and sugar until fluffy — not rushed, just light and pale. Beat in eggs and vanilla slowly.
Whisk your dry ingredients and fold them gently into the batter with milk until smooth and thick.
Chop the poached pears into chunks and swirl them through like hidden treasure.
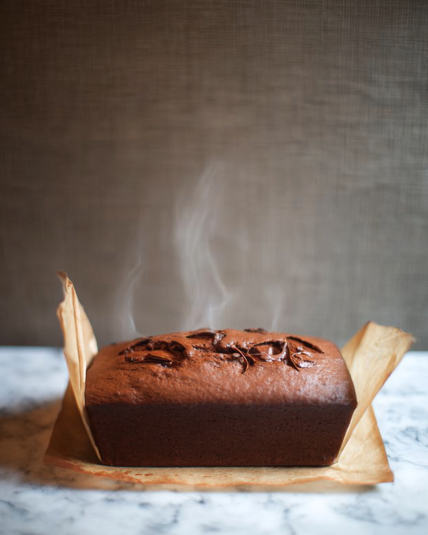
Pour into your pan, breathe in that spicy sweetness, and bake until the top springs back and a toothpick comes out mostly clean.
Let it cool slightly so flavors settle — trust me, it’s worth the wait.
Chef’s Notes and Tips For A Flawless Poached Pear Ginger Cake
Don’t overcook pears — soft but still holding shape is perfect.
Save extra poaching syrup to drizzle over slices or stir into tea.
Let cake rest 30 minutes before cutting for best texture.
Get Creative! Easy Substitutions and Fun Variations
Add chopped walnuts or pecans
Swap pears for apples
Use maple syrup in poaching liquid
Add orange zest to batter
Top with cream cheese glaze
Lighten It Up! Simple Swaps for a Healthier Poached Pear Ginger Cake
Use half whole wheat flour
Replace butter with applesauce or oil
Reduce sugar slightly
Use low-fat yogurt
And There You Have It
A soft, spiced, fruit-studded cake that feels bakery-worthy but comes together so simply.
Once you try this poached pear ginger cake, it’ll become your cozy season classic.
Are You Curious About Anything Else? Take a Look at the Most Frequently Asked Questions We Get About This Recipe
1. Can I make poached pear ginger cake ahead of time?
Yes — this moist ginger cake with poached pears actually tastes better the next day. The spices deepen, and the pear moisture keeps the crumb soft and tender.
Store wrapped tightly at room temperature for up to two days or refrigerate for longer freshness. Warm slices briefly before serving for that just-baked feel.
2. What pears work best for poached pear ginger cake recipe from scratch?
Bosc and Anjou pears are ideal because they soften beautifully without falling apart.
Bartlett pears are sweeter but cook faster, so keep a close eye. The goal is tender but still sliceable fruit that melts gently into the cake.
3. Can I skip poaching and use fresh pears instead?
You can — but poaching adds incredible flavor and moisture.
Fresh pears won’t infuse the cake with warm spice syrup the same way. If short on time, toss chopped pears with cinnamon and sugar before folding in.
4. Why is my ginger cake dry?
Overbaking is the most common cause.
Pull the cake when crumbs still cling slightly to the toothpick. Also measure flour carefully — too much dries it out quickly.
5. Can I freeze pear ginger cake?
Absolutely! Wrap tightly in plastic wrap and foil.
Freeze up to three months. Thaw overnight and warm slightly before serving.
6. Is this ginger cake very spicy?
It’s warmly spiced, not hot.
You can adjust ginger to taste — add more for bold flavor or reduce for milder sweetness.
7. Can I make this into muffins instead of a cake?
Yes! Fill liners about ¾ full and bake 18–22 minutes.
They’re perfect for breakfast treats or lunchbox desserts.
8. What should I serve with poached pear ginger cake?
Vanilla ice cream, whipped cream, or yogurt pair beautifully.
A drizzle of leftover pear syrup makes it truly irresistible.
Poached Pear Ginger Cake
4
servings30
minutes40
minutes300
kcalIngredients
Ripe but firm pears
Brown sugar
Fresh ginger (or ground)
Cinnamon & cloves
Butter or oil
Eggs
Flour
Baking soda
Vanilla extract
Milk or yogurt
Directions
- Start by simmering peeled pears in water with brown sugar, ginger, and warm spices until just tender. Let them soak up all that cozy syrup while you prep the batter.
- Cream butter and sugar until fluffy — not rushed, just light and pale. Beat in eggs and vanilla slowly.
- Whisk your dry ingredients and fold them gently into the batter with milk until smooth and thick.
- Chop the poached pears into chunks and swirl them through like hidden treasure.
- Pour into your pan, breathe in that spicy sweetness, and bake until the top springs back and a toothpick comes out mostly clean.
- Let it cool slightly so flavors settle — trust me, it’s worth the wait.