
There’s a very specific moment when pastrami sliders become inevitable. It’s usually late afternoon. People are hungry. You want something comforting but not complicated.
The first time I made these, the smell alone did half the work. Warm bread. Peppery pastrami. Butter sizzling with mustard and garlic. I remember thinking, okay, this is dangerous.
I wasn’t aiming for fancy. I wanted fast. Something that felt like a New York deli hugged a pan of sliders and said, “Relax, I’ve got you.”
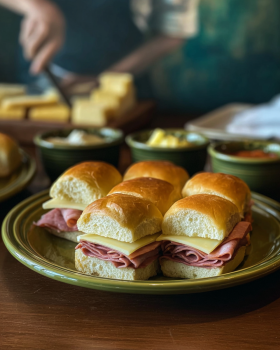
When they came out of the oven, bubbling and glossy, I pulled one apart and the cheese stretched just enough to make everyone pause. That pause? Victory.
Since then, this easy pastrami sliders recipe has saved game nights, casual dinners, and more “unexpected guests” than I can count.
They’re low effort but feel indulgent. Familiar but exciting.
You don’t need perfect timing or chef skills—just a little confidence and a hot oven.
And yes, people will ask for the recipe.
Recipe Resume (Why You’ll Love These Now)
Baked, not fried.
One pan, zero stress.
Bold deli flavor.
Perfect for parties.
Ready in under 30 minutes.
Make-ahead friendly.
Customizable fillings.
Guaranteed crowd-pleaser.
Why This Easy Pastrami Sliders Recipe Is The Only One You’ll Ever Need
I made these once for my family “just to snack on.” We ate dinner standing up. My spouse claimed one slider and somehow had four.
Now they’re requested constantly—especially when people want comfort food without a whole production.
Cuisine: American (Deli-inspired)
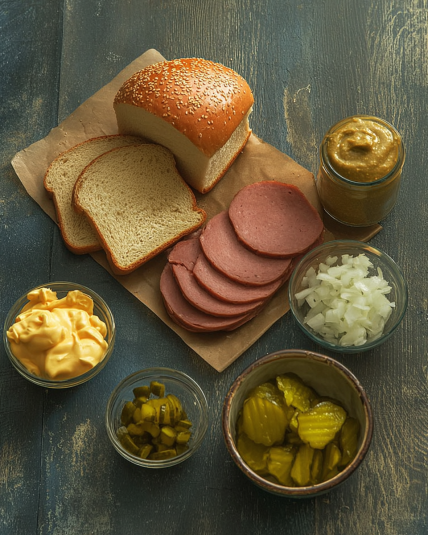
What You Really Need to Make This Amazing Easy Pastrami Sliders Recipe (Simplified)
- 12 Hawaiian rolls (or soft slider buns)
- 12 oz sliced pastrami
- 6–8 slices Swiss cheese
- 3 tablespoons butter, melted
- 1 tablespoon Dijon mustard
- ½ teaspoon garlic powder
- ½ teaspoon onion powder
- Optional: sauerkraut or pickles
How to Master the Perfect Easy Pastrami Sliders (My Secret Method)
Slice the rolls horizontally as one big slab—don’t separate them yet. This keeps everything neat and cozy.
Layer the bottom with pastrami, folding it loosely so it stays tender. Add Swiss cheese right on top. If you love tang, slip in a little sauerkraut.
Place the tops back on. In a small bowl, mix melted butter, Dijon, garlic powder, and onion powder. Brush generously. Be bold here—this is where flavor lives.
Cover loosely with foil and bake at 180°C (350°F) for about 15 minutes. Uncover and bake 5–7 more minutes until golden and melty.
Rest briefly. Slice. Watch them vanish.
Chef’s Notes and Tips For A Flawless Easy Pastrami Sliders Recipe
Don’t pack the pastrami flat—folding it creates air pockets that stay juicy during baking. That’s deli magic.
Also, Swiss cheese is classic, but don’t overload. Too much cheese can overwhelm the pastrami’s peppery bite.
Get Creative! Easy Substitutions and Fun Variations
Swap Swiss for provolone or mozzarella.
Add caramelized onions for sweetness.
Use rye slider buns for a deli twist.
Serve with spicy mustard or Russian dressing.
Lighten It Up! Simple Swaps for a Healthier Pastrami Sliders Recipe
Use whole wheat rolls.
Choose lean pastrami slices.
Reduce butter by half and brush lightly.
Serve with a fresh salad instead of fries.
And there you have it!
Easy pastrami sliders that feel indulgent without the effort. Make them once, and they’ll quietly become your “go-to.” Don’t forget to tell me how yours turned out—and maybe explore a few more recipes while you’re at it.
Are You Curious About Anything Else? Take a Look at the Most Frequently Asked Questions We Get About This Recipe
1. Can I make easy pastrami sliders ahead of time?
Yes—and they’re perfect for it. Assemble the sliders fully, cover tightly, and refrigerate for up to 24 hours.
When ready, bake as directed. Add a few extra minutes to ensure the center heats through evenly.
2. What’s the best cheese for baked pastrami sliders?
Swiss is classic because it melts smoothly and balances pastrami’s spice. Provolone works well if you want something milder.
Avoid overly sharp cheeses—they overpower the deli flavor.
3. Can I freeze pastrami sliders?
You can freeze them unbaked. Wrap tightly and freeze for up to one month.
Bake from thawed for best texture. Freezing after baking can dry them out.
4. Are pastrami sliders good for parties?
They’re ideal. Easy pastrami sliders stay warm, slice cleanly, and hold flavor even after sitting out briefly.
That’s why they’re a staple for game days and gatherings.
5. What rolls work best for party pastrami sliders?
Hawaiian rolls are soft and slightly sweet, which contrasts beautifully with salty pastrami.
For a more classic deli feel, try mini rye buns.
6. Can I make these sliders without an oven?
You can use a covered skillet on low heat, though the tops won’t brown the same way.
The oven gives the most even melt and texture.
7. Are pastrami sliders spicy?
Pastrami has peppery notes, not heat. They’re flavorful but not spicy.
Add spicy mustard or jalapeños if you want more kick.
8. What sides go best with pastrami sliders?
Potato salad, coleslaw, or simple pickles pair perfectly.
For lighter meals, serve with a crisp green salad or roasted vegetables.
Easy Pastrami Sliders
4
servings30
minutes40
minutes300
kcalIngredients
12 Hawaiian rolls (or soft slider buns)
12 oz sliced pastrami
6 –8 slices Swiss cheese
3 tablespoons butter, melted
1 tablespoon Dijon mustard
½ teaspoon garlic powder
½ teaspoon onion powder
Optional: sauerkraut or pickles
Directions
- Slice the rolls horizontally as one big slab—don’t separate them yet. This keeps everything neat and cozy.
- Layer the bottom with pastrami, folding it loosely so it stays tender. Add Swiss cheese right on top. If you love tang, slip in a little sauerkraut.
- Place the tops back on. In a small bowl, mix melted butter, Dijon, garlic powder, and onion powder. Brush generously. Be bold here—this is where flavor lives.
- Cover loosely with foil and bake at 180°C (350°F) for about 15 minutes. Uncover and bake 5–7 more minutes until golden and melty.
- Rest briefly. Slice. Watch them vanish.