
There’s something about a chocolate pie that feels like home before you even take a bite.
I can still picture my grandma’s kitchen — the hum of the fridge, the faint smell of coffee, and that unmistakable chocolate aroma drifting through the house. It always meant something special was happening.
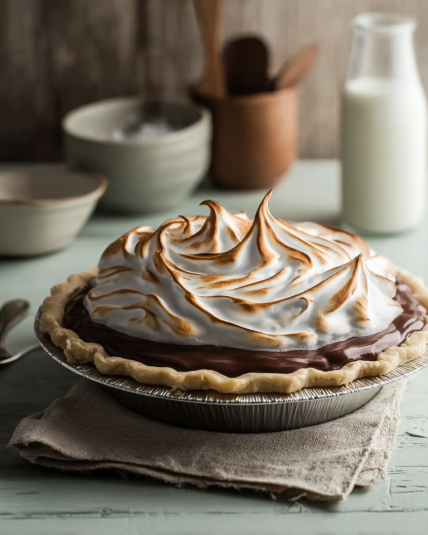
This pie wasn’t flashy. No fancy toppings, no tricks. Just a smooth, glossy chocolate filling tucked into a flaky crust and chilled until perfect.
Grandma made it without a recipe card, measuring with her eyes and a well-used spoon. I used to hover nearby, pretending not to stare.
It was the dessert she made when she wanted to say “I love you” without actually saying it.
And honestly? That’s still how it feels when I make it now.
Recipe Resume (Why You’ll Love It)
Silky chocolate custard
Old-fashioned flavor
No boxed pudding
Simple pantry ingredients
Perfect make-ahead dessert
Not overly sweet
Crowd-pleasing classic
Pure nostalgia in every slice
Why This Grandma’s Chocolate Pie Is The Only One You’ll Ever Need
This recipe survived decades for a reason. It works. Every time.
I remember the first time I tried to “modernize” it — espresso powder, fancy chocolate, extra steps. Grandma took one bite and just smiled politely. That was lesson enough.
The beauty of this classic southern chocolate pie is its simplicity. It’s humble, rich, and comforting.
No shortcuts. No distractions. Just chocolate done right.
Cuisine: American (Southern-inspired)
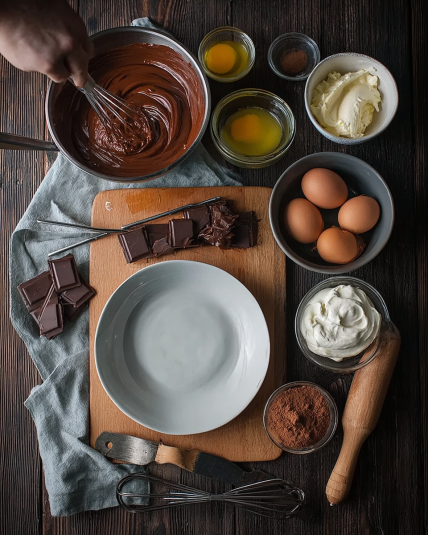
What You Really Need to Make This Amazing Grandma’s Chocolate Pie (Simplified)
- Pie crust (homemade or store-bought, baked)
- Granulated sugar
- Unsweetened cocoa powder
- Cornstarch
- Salt
- Whole milk
- Egg yolks
- Butter
- Vanilla extract
How to Master the Perfect Grandma’s Chocolate Pie (My Secret Method)
Start by whisking the dry ingredients in a saucepan — sugar, cocoa, cornstarch, and salt. Make sure there are no cocoa lumps hiding.
Slowly whisk in the milk, then place the pan over medium heat. This is not the time to walk away. Stir constantly, scraping the bottom, until it thickens into a smooth pudding-like texture.
Once it bubbles gently, cook just a bit longer. This is where the magic happens — glossy, thick, and rich.
Remove from heat and stir in butter and vanilla until melted and silky. Pour immediately into your baked crust and smooth the top.
Let it cool, then chill until fully set. Patience here pays off.
Chef’s Notes and Tips For A Flawless Grandma’s Chocolate Pie
Low and slow is everything. Rushing the heat can scorch the cocoa and ruin the texture. Gentle bubbles are your cue, not a rolling boil.
Cover the surface with plastic wrap while cooling to prevent a skin from forming. Grandma did this long before it was trendy — and she was right.
Get Creative! Easy Substitutions and Fun Variations
Swap some milk for half-and-half for a richer pie.
Top with fresh whipped cream, toasted meringue, or shaved chocolate if you’re feeling fancy — but the classic version shines on its own.
Lighten It Up! Simple Swaps for a Healthier Chocolate Pie
Use 2% milk instead of whole milk for a lighter custard.
Reduce sugar slightly — this old-fashioned chocolate pie is forgiving and still deeply chocolatey.
Closing
And there you have it — Grandma’s chocolate pie, just the way it was meant to be. Simple, comforting, and unforgettable. If you make it, I’d love to hear whose kitchen it reminds you of. And don’t forget to browse a few more of our classic recipes while you’re here.
Are You Curious About Anything Else? Take a Look at the Most Frequently Asked Questions We Get About This Recipe
What makes grandma’s chocolate pie different from modern chocolate pie?
Grandma’s chocolate pie is all about texture and balance. It’s a true chocolate custard, thickened gently on the stovetop rather than relying on boxed mixes or instant pudding.
Modern versions often lean sweeter or heavier. This old fashioned chocolate pie lets the cocoa shine without overwhelming your palate, which is why it’s stood the test of time.
Why is my chocolate pie filling runny?
A runny filling usually means it didn’t cook long enough. Cornstarch needs heat and time to fully activate.
Make sure the mixture bubbles gently for at least 30–60 seconds while stirring constantly. Once chilled, the filling will firm up beautifully.
Can I make grandma’s chocolate pie ahead of time?
Yes — this homemade chocolate pie from scratch is perfect for making ahead.
It actually improves after a few hours in the fridge. Make it up to 24 hours in advance, cover well, and add toppings just before serving.
Do I need to blind bake the crust?
Absolutely. Since the filling is cooked separately, the crust must be fully baked beforehand.
A soggy crust is the fastest way to ruin an otherwise perfect classic chocolate custard pie.
Can I use cocoa powder instead of chocolate bars?
Yes, and that’s traditional. Unsweetened cocoa powder gives a deeper, more nostalgic flavor.
It’s also what keeps this recipe simple and pantry-friendly — just like Grandma intended.
How do I prevent lumps in chocolate pie filling?
Whisk dry ingredients thoroughly before adding milk, and stir constantly once heated.
If lumps do appear, don’t panic — a quick pass with an immersion blender can save the day.
Is this chocolate pie very sweet?
No, it’s pleasantly balanced. The cocoa provides richness without overpowering sweetness.
That’s why this easy chocolate custard pie pairs so well with lightly sweetened whipped cream.
Can I make this pie gluten-free?
Yes! Simply use a gluten-free pie crust.
The filling itself is naturally gluten-free, making grandma’s chocolate pie an easy adaptation for dietary needs without sacrificing flavor.
Grandma’s Chocolate Pie
4
servings30
minutes40
minutes300
kcalIngredients
Pie crust (homemade or store-bought, baked)
Granulated sugar
Unsweetened cocoa powder
Cornstarch
Salt
Whole milk
Egg yolks
Butter
Vanilla extract
Directions
- Start by whisking the dry ingredients in a saucepan — sugar, cocoa, cornstarch, and salt. Make sure there are no cocoa lumps hiding.
- Slowly whisk in the milk, then place the pan over medium heat. This is not the time to walk away. Stir constantly, scraping the bottom, until it thickens into a smooth pudding-like texture.
- Once it bubbles gently, cook just a bit longer. This is where the magic happens — glossy, thick, and rich.
- Remove from heat and stir in butter and vanilla until melted and silky. Pour immediately into your baked crust and smooth the top.
- Let it cool, then chill until fully set. Patience here pays off.