
There are some recipes that feel like home before you even taste them. Classic apple pie is one of those.
I still remember the sound of apples being sliced on a wooden board, the soft thud of each piece landing in a bowl, cinnamon already floating in the air before it ever hit the fruit.
Apple pie isn’t fancy food. It’s honest food. It shows up at holidays, potlucks, quiet Sundays, and sometimes on random Tuesdays when life feels heavy and you need something grounding.
The first time I made a homemade classic apple pie from scratch, I was nervous. Dough feels intimidating. Apples weep. Ovens have moods.
But once it baked, something shifted. The smell filled every corner of the house. People wandered into the kitchen “just to check on it.” You know the look.
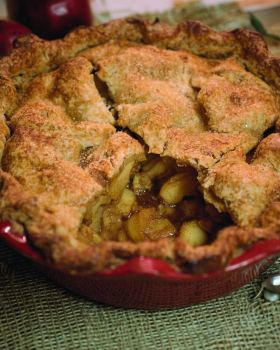
That golden crust, bubbling edges, and that unmistakable sweet-tart apple filling… it felt like a small win worth celebrating.
This recipe is simple, forgiving, and deeply nostalgic — exactly how an old fashioned apple pie should be.
Recipe Resume (Why You’ll Love It)
Flaky, buttery crust
Perfect apple-to-spice balance
Not overly sweet
Beginner-friendly
Crowd-pleasing
Make-ahead friendly
Freezer-friendly
Pure comfort
Why This Classic Apple Pie Is The Only One You’ll Ever Need
This apple pie became the request in my house after one holiday dinner where the pie disappeared faster than the turkey.
I had used a mix of apples because that’s what I had, eyeballed the cinnamon, and slightly overbaked it because I got distracted. Somehow, that messy moment created perfection.
What makes this recipe special is its balance. The apples stay tender but not mushy. The filling thickens without turning gummy. The crust? Crisp, golden, and forgiving.
It’s the kind of homemade classic apple pie that doesn’t try to reinvent anything — it just gets everything right.
Cuisine: American
What You Really Need to Make This Amazing Classic Apple Pie (Simplified)
- Pie crusts (homemade or store-bought)
- Apples (a mix works best — see tips below)
- Granulated sugar
- Brown sugar
- Ground cinnamon
- Nutmeg (optional)
- Lemon juice
- All-purpose flour or cornstarch
- Butter
- Egg (for egg wash)
How to Master the Perfect Classic Apple Pie (My Secret Method)
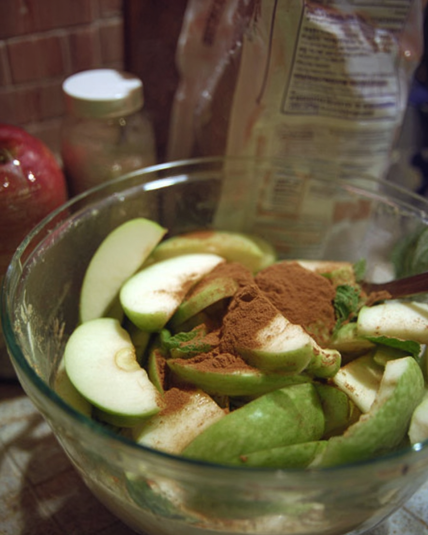
Start with the apples. Peel, slice, and toss them gently with lemon juice so they don’t brown while you work. The smell alone will tell you you’re on the right path.
Mix the sugars, spices, and flour separately, then sprinkle it over the apples instead of dumping everything in at once. This keeps the filling evenly coated and avoids dry pockets.
Roll out your bottom crust and let it relax into the pie dish. No stretching — that’s how shrinkage happens later. Add the apples, mounding slightly in the center like a little hill.
Dot butter over the top, tuck in the top crust, crimp the edges (imperfect is perfect), and brush with egg wash. A few slits on top let steam escape and prevent sogginess.
Bake until the crust is deeply golden and the filling bubbles like it means business. Let it cool. I know it’s hard. But patience here makes clean slices later.
Chef’s Notes and Tips For A Flawless Classic Apple Pie
Use a mix of apples for the best flavor. Granny Smith brings tartness, Honeycrisp adds sweetness, and Fuji gives juiciness. This combo creates depth without overpowering sweetness.
If the crust browns too quickly, loosely tent with foil. Don’t skip resting time after baking — the filling sets as it cools, which means less soup and more structure.
Get Creative! Easy Substitutions and Fun Variations
Add a pinch of cardamom or cloves for warmth.
Swap the top crust for a crumb topping if you’re craving texture. You can also turn this into mini hand pies or bake it in a cast-iron skillet for extra crisp edges.
Lighten It Up! Simple Swaps for a Healthier Classic Apple Pie
Reduce sugar slightly and rely more on naturally sweet apples.
Use whole wheat pie crust or a lower-fat crust. You can also thicken with cornstarch instead of flour for a lighter filling.
Closing
And there you have it — a classic apple pie that tastes like memories, comfort, and just a little pride. If you bake it, tell me how it turned out. And while you’re here, don’t forget to explore a few more cozy dessert recipes waiting for you.
Are You Curious About Anything Else? Take a Look at the Most Frequently Asked Questions We Get About This Recipe
What are the best apples for classic apple pie?
The best apples for classic apple pie are those that hold their shape while baking and offer balanced flavor.
Granny Smith apples provide tartness and structure, while Honeycrisp and Fuji add natural sweetness and juiciness. Using a mix prevents the filling from becoming flat or overly sweet.
Avoid very soft apples like Red Delicious, which tend to break down and create a mushy texture in homemade classic apple pie.
How do I keep my apple pie from being watery?
Watery apple pie usually comes from excess juice and insufficient thickening.
Tossing apples with flour or cornstarch before baking helps absorb released juices. Letting the pie cool completely after baking allows the filling to set properly.
Using a mix of apples instead of all juicy varieties also helps control moisture in an old fashioned apple pie.
Can I make classic apple pie ahead of time?
Yes, classic apple pie from scratch is an excellent make-ahead dessert.
You can bake it up to two days in advance and store it covered at room temperature. The flavors deepen as it rests, making it even better the next day.
For longer storage, freeze the baked pie and reheat gently in the oven until warmed through.
Should I cook the apple filling before baking?
For this easy classic apple pie recipe, pre-cooking isn’t necessary.
Baking the apples raw allows them to soften naturally while thickening the filling at the same time. This keeps the texture balanced and prevents overcooking.
Pre-cooking can be helpful for very juicy apples, but it’s optional, not required.
How do I get a flaky pie crust?
Cold fat and minimal handling are key.
Keep butter cold, avoid overworking the dough, and chill the crust before baking. A hot oven helps the fat steam quickly, creating layers that result in a flaky crust.
This technique is essential for a homemade classic apple pie that looks and tastes bakery-worthy.
Can I freeze classic apple pie?
Absolutely.
You can freeze it baked or unbaked. Wrap tightly to prevent freezer burn. Bake frozen pie directly from the freezer, adding extra time as needed.
Freezing makes this recipe perfect for holidays and future cravings.
Is apple pie better warm or cold?
That’s a personal debate in many households.
Warm apple pie highlights the spices and soft filling, especially with vanilla ice cream. Cold apple pie offers cleaner slices and a firmer texture.
Both are valid. Both are delicious.
How long does classic apple pie last?
At room temperature, apple pie keeps well for up to two days.
Refrigerated, it lasts about four to five days. Reheat slices in the oven for best texture rather than the microwave, which can soften the crust.
Classic apple pie is one of those rare desserts that stays comforting even days later.
Classic Apple Pie
4
servings30
minutes40
minutes300
kcalIngredients
Pie crusts (homemade or store-bought)
Apples (a mix works best — see tips below)
Granulated sugar
Brown sugar
Ground cinnamon
Nutmeg (optional)
Lemon juice
All-purpose flour or cornstarch
Butter
Egg (for egg wash)
Directions
- Start with the apples. Peel, slice, and toss them gently with lemon juice so they don’t brown while you work. The smell alone will tell you you’re on the right path.
- Mix the sugars, spices, and flour separately, then sprinkle it over the apples instead of dumping everything in at once. This keeps the filling evenly coated and avoids dry pockets.
- Roll out your bottom crust and let it relax into the pie dish. No stretching — that’s how shrinkage happens later. Add the apples, mounding slightly in the center like a little hill.
- Dot butter over the top, tuck in the top crust, crimp the edges (imperfect is perfect), and brush with egg wash. A few slits on top let steam escape and prevent sogginess.
- Bake until the crust is deeply golden and the filling bubbles like it means business. Let it cool. I know it’s hard. But patience here makes clean slices later.