
Pumpkin scones always pull me straight into that cozy autumn feeling, even when I make them in the middle of summer—which, honestly, happens more than I’d like to admit. The first time I baked these fluffy pumpkin spice scones from scratch, my whole kitchen smelled like cinnamon, nutmeg, and warm memories. It brought me right back to crisp mornings, hot coffee, and that quiet moment before the day gets chaotic.
I remember experimenting with this recipe on a whim, mostly because I had a half-open can of pumpkin purée sitting in the fridge and zero desire to make soup. I tossed everything into a bowl, not expecting anything magical, but the moment that tray came out of the oven… oh wow. Soft, moist centers. Crisp little edges. That golden pumpkin color. I couldn’t believe I made them at home.

Over time, these scones became my go-to comfort bake. Whenever a friend drops by unexpectedly, or when I need something warm and grounding, I whip out this dough. It’s simple, forgiving, and kind of therapeutic—especially when you’re rubbing the cold butter into the flour with your fingertips. Messy? Yes. Worth it? Absolutely.
And pumpkin scones just feel special, right? They’re rustic but elegant, sweet but not too sweet, and genuinely perfect with your morning latte. If you’ve been wondering how to make bakery-style pumpkin scones at home, this is the recipe that finally gets you there—without fuss, without fancy skills, and without any stiff, dry crumb (a tragedy I refuse to allow).
So, grab your spices, warm your oven, and let’s bake something that feels like a hug.
Recipe Resume – Todd Wilbur Style
Soft on the inside, crisp on the outside—total scone perfection.
Pumpkin keeps them naturally moist without extra fat.
Cinnamon glaze sends them over the top.
Ready in under 30 minutes, no chill time needed.
A fall bakery classic—made affordable at home.
Pairs perfectly with coffee, tea, or chai.
Beginner-friendly and almost impossible to mess up.
The flavor screams cozy-season comfort.
Why These Pumpkin Scones Are The Only Ones You’ll Ever Need
My sister still teases me about the first time she tried these. She said she’d “just take half” to be polite… then quietly ate two more while we chatted. That’s when I knew this easy homemade pumpkin scones recipe was a keeper. Now, whenever we have family brunch, she texts me the night before: “You’re making the scones, right?”
Cuisine: American / Bakery
What You Really Need to Make These Amazing Pumpkin Scones (Simplified)
- Flour
- Baking powder
- Salt
- Cinnamon + pumpkin pie spice
- Cold butter
- Brown sugar
- Pumpkin purée
- Egg
- Heavy cream (or milk)
- Vanilla
- Powdered sugar (for glaze)
How to Master the Perfect Pumpkin Scones (My Secret Method)
Start by whisking your dry ingredients—it wakes up the spices and gives the scones their warm aroma. Now add the cold butter and rub it in with your fingertips until it looks like coarse crumbs. It should feel sandy, not smooth. That texture is what creates flaky pockets later.
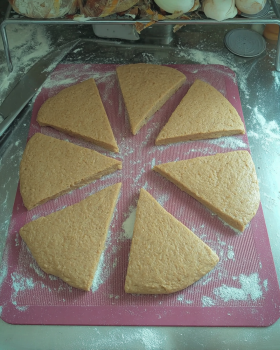
In a small bowl, mix the pumpkin, egg, cream, and vanilla. Pour it into the flour and gently fold everything together. The dough should come together in a shaggy, slightly sticky mass. Don’t overwork it—minimal touching keeps the scones light. Shape into a round, slice into wedges, and bake until the edges look crisp and your kitchen smells like heaven.
Drizzle the glaze while they’re still warm so it melts ever so slightly.
Chef’s Notes and Tips For A Flawless Pumpkin Scones
Pumpkin adds moisture, so resist the urge to add extra liquid. If the dough feels sticky, dust lightly with flour but don’t knead. Overmixing is the enemy of fluffy scones.
For taller scones, place them in the freezer for 10 minutes before baking. That cold shock helps them rise high and keeps the texture tender.
Get Creative! Easy Substitutions and Fun Variations
Use maple glaze instead of vanilla for a deeper fall flavor. Add dark chocolate chips or dried cranberries for texture. Swap part of the flour for oat flour for a rustic twist.
You can also turn these into mini scones—just cut the dough into 16 smaller wedges and reduce the baking time slightly.
Lighten It Up! Simple Swaps for a Healthier Pumpkin Scone
Use coconut sugar instead of brown sugar and replace heavy cream with low-fat milk. A mix of whole-wheat pastry flour and all-purpose flour (50/50) works beautifully.
You can also reduce the glaze or drizzle lightly instead of fully coating for a lower-calorie treat.
Closing
And there you have it! Soft, cozy, bakery-style scones made right in your kitchen. Don’t forget to tell me how they turned out—and check out my other irresistible recipes.
Are You Curious About Anything Else? Take a Look at the Most Frequently Asked Questions We Get About Pumpkin Scones
1. How do I keep my pumpkin scones from turning dry?
Dry scones almost always mean the dough was overmixed or too much flour was added. Because pumpkin purée adds moisture, you don’t need a heavily hydrated dough. When making this easy homemade pumpkin scones recipe, mix until the dough just comes together. A little messiness is actually a good sign.
Also, baking time matters. Scones continue to set after coming out of the oven, so pull them when the tops look set but not browned deeply. That’s how you preserve that soft, moist center that makes people think you bought them from a bakery.
2. Why are my scones not rising enough?
Flat scones usually come from warm butter. To get that tall rise you expect from bakery-style pumpkin scones, the butter must stay cold so it creates steam pockets in the oven. If your kitchen is warm, freeze the shaped dough for about 10 minutes before baking. It makes a noticeable difference.
3. Can I use fresh pumpkin instead of canned pumpkin purée?
Yes, just make sure it’s thick and not watery. Fresh pumpkin varies in moisture, so you may need to drain it or simmer it briefly. Too much liquid can keep your fluffy pumpkin spice scones from scratch from rising properly.
4. Can I make these pumpkin scones dairy-free?
Absolutely. Use cold vegan butter, coconut milk in place of cream, and a dairy-free glaze. The texture stays surprisingly close to the original, though the flavor may be slightly richer.
5. Can I freeze pumpkin scones?
Yes—before or after baking. For the best texture, freeze them unbaked and bake directly from frozen. This preserves the lift and tenderness of your best moist pumpkin scones with glaze.
6. Why is my dough too sticky to handle?
Pumpkin adds moisture, so sticky dough is normal. Dust lightly with flour, but avoid kneading. The less you handle the dough, the fluffier the scones.
7. How can I make the glaze thicker or thinner?
For thicker glaze, add more powdered sugar. For a thinner drizzle, add milk drop by drop. A tiny splash of vanilla always boosts flavor.
8. What’s the best way to store leftover scones?
Store them in an airtight container at room temperature for up to two days. If you want them warm again, a quick 5 minutes in the oven revives them perfectly.
Pumpkin Scones
4
servings30
minutes40
minutes300
kcalIngredients
Flour
Baking powder
Salt
Cinnamon + pumpkin pie spice
Cold butter
Brown sugar
Pumpkin purée
Egg
Heavy cream (or milk)
Vanilla
Powdered sugar (for glaze)
Directions
- Start by whisking your dry ingredients—it wakes up the spices and gives the scones their warm aroma. Now add the cold butter and rub it in with your fingertips until it looks like coarse crumbs. It should feel sandy, not smooth. That texture is what creates flaky pockets later.
- In a small bowl, mix the pumpkin, egg, cream, and vanilla. Pour it into the flour and gently fold everything together. The dough should come together in a shaggy, slightly sticky mass. Don’t overwork it—minimal touching keeps the scones light. Shape into a round, slice into wedges, and bake until the edges look crisp and your kitchen smells like heaven.
- Drizzle the glaze while they’re still warm so it melts ever so slightly.